


One of the biggest CMMS system hardships for maintenance Planners and Schedulers is screen clutter. They work with such extensive data sets, and there’s so many details on-screen, that a big part of their efficiency comes down to what they can (and can’t) see quickly. If it doesn’t catch their eye or stand out, it’s that much more work for the Planner or Scheduler to scan for it and find it. So, being able to find required or key fields becomes really important to improve their efficiency.
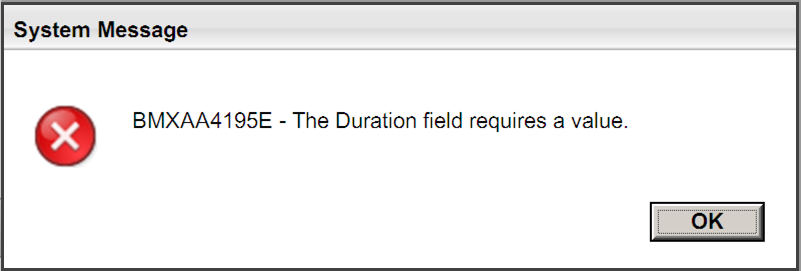
As I wrote this article about user-friendly URLs, it made me recall a similar user-friendliness request from a previous customer. There was an influx of Maximo users at this organization: Planners, Schedulers, Supervisors and regular front-end users. All of them had the same complaint: “I am tired of seeing pop-ups like this one come up all the time.”
I know that most people will think, "Why not just set a default value?" or something similar, but we're talking about fields that have no default value to them; tribal knowledge is used to populate them, but they're still required.
This was a fairly common occurrence because people will miss “Required” fields on the screen, because those fields were hard to spot.
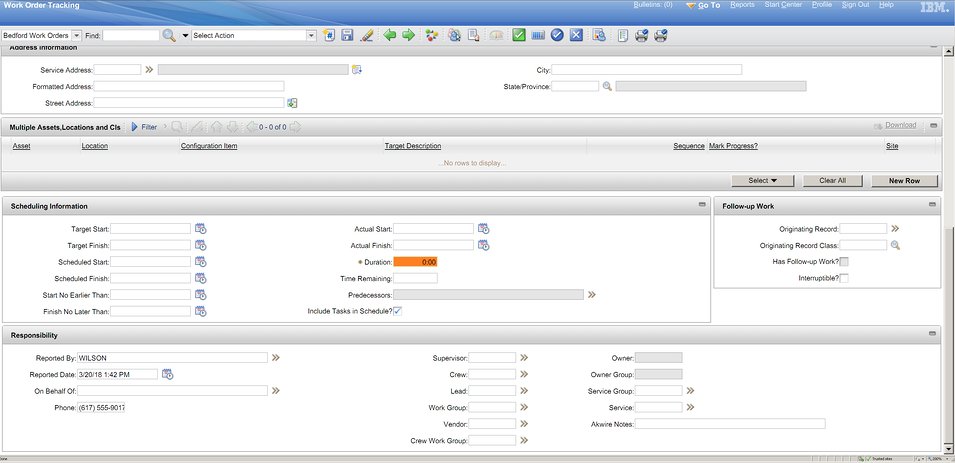
In the screenshot below, you can see the Required fields, but the screen is magnified 200% (to make it easy on you). Otherwise, looking for the Required fields is like playing the worst-ever game of Where’s Waldo?

To add to this, they had to create 100 or so work orders per day.
The consensus on site was, “Let’s find a way to make all the Required fields stand out.” And for some reason, orange was chosen as the stand-out color. Now, how can you achieve this?
Changing the Color of Required Fields in IBM Maximo CMMS
We decided to perform this change globally so that every single application in Maximo will have the same behavior: the Required fields will be orange. In IBM Maximo CMMS, the color schemes are controlled by the Maximo.CSS file.
In my case, this file was found here: C:\ibm\SMP\maximo\applications\maximo\maximouiweb\webmodule\webclient\skins\
tivoli09\css
Then, it’s simply a matter of modifying the correct section. The section we modified in this case was the .fld_req section, shown below:
.fld_req {
background-color: #ffffe6;
border:1px solid #dcdca9;
In our case, we changed the hexadecimal color value of ffffe6 to ff8000. You can change it to any hex color value that works best for you or meets your company’s style guides.
After making that change, you will need to rebuild the Maximo EAR file and deploy it for the changes to take effect.
In my case, this is how Maximo Required fields looked after the change. Much easier to spot Waldo, wouldn’t you say? (Once again, we magnified the screen 200% to make it easier on your eyes.)
Hopefully this helps you out if you’re tired of straining your eyes looking for specific fields, give it a try on your system!
Last Updated: December 11, 2024
